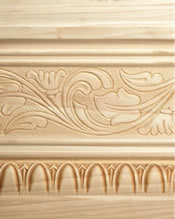
Our Base Mouldings are all made of the highest quality wood. They come in various lengths and there are many styles to choose from. Click on a picture to view our base moulding product line. All items are shipped to your specified address. We do not require minimum orders. Email us if you have any questions. We will respond promptly. sales@mouldings.cc
Click here to View Our Base Moulding.
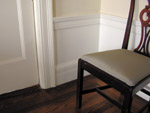
Base moulding is used as a decorative
border where the walls meet the floor.
Base molding also protects the walls
when vacuuming carpet or cleaning the floors.
Base moulding serves as a finish between the finished wall and floor. It is available in several widths and forms. Two-piece base consists of a baseboard topped with a small base cap (figure A).
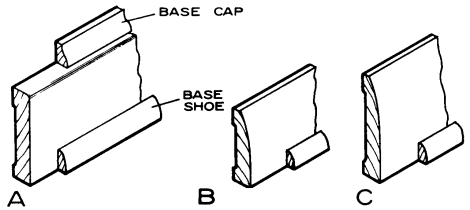
When plaster is not straight and true, the small base moulding will conform more closely to the variations than will the wider base alone. A common size for this type of baseboard is 5/8 by 3 1/4 inches or wider. One-piece base varies in size from 7/16 by 2 1/4 inches to 1/2 by 3 1/4 inches and wider (figures B and C).Although a wood member is desirable at the junction of the wall and carpeting to serve as a protective "bumper," wood trim is sometimes eliminated entirely.
Most baseboards are finished with a base shoe, 1/2 by 3/4 inch in size (figures A, B, and C). A single-base moulding without the shoe is sometimes placed at the wall-floor junction, especially where carpeting might be used.
Installation of Base Moulding
Square-edged baseboard should be installed with a butt joint at inside corners and a mitered joint at outside
corners (figure D).
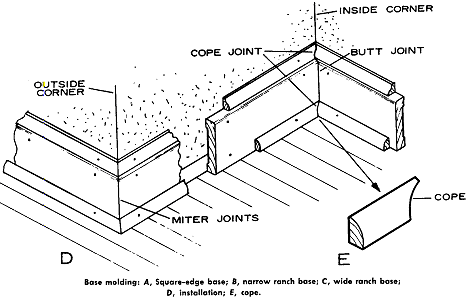
It should be nailed to each stud with two eightpenny finishing nails. Moulded single-piece base, base, and base shoe should have a coped joint at inside corners and a mitered joint at outside corners. A coped joint is one in which the first piece is square-cut against the plaster or base and the second moulding coped. This is accomplished by sawing a 45 degree miter cut and with a coping saw trimming the moulding along the inner line of the miter (figure E).
The base shoe should be nailed into the subfloor with long slender nails and not into the baseboard itself. Thus, if there is a small amount of shrinkage of the joists, no opening will occur under the shoe.
Casing and Base
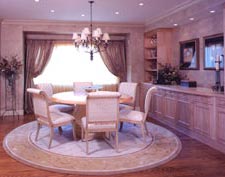
Whether you are restoring an older home or enhancing a blasé ranch or newer spec house lacking in character, there is no more important moulding decision than your casing (around doors and windows) and baseboard — the key to a successful and harmonious interior. Ideally, casing and base should complement the architectural style of your home, not conflict with or detract from it (e.g., fluted casing with corner rosettes designed for tall narrow windows and high ceilings of Victorian era houses looks incongruous in a low-slung ranch house with sliding patio doors and picture windows).
If you have an older house, in which the interior trim has been modified over time, the safest choice is to return to what was or could have been there originally. Each period style has a unique moulding vocabulary corresponding to such things as ceiling height, window and door shapes, etc. Moulding in a sturdy bungalow, for example, is characteristically stout, while trim in a vertically oriented Victorian is accordingly tall and soaring.
Although there is nothing inherently wrong with the narrow sanitary moulding so popular in the last half of the twentieth century, which suited the flowing horizontal lines and broad expanses of windows characteristic of modernist homes, many homeowners have a craving for something more substantial. Stepping up from a 1 1/2” to 3 1/2” or greater casing and base produces a dramatic transformation, without comprising your home’s integrity. Wider moulding with clean lines and a correspondingly simple base will create an Arts and Crafts or contemporary look, while a detailed casing will give a more formal, traditional ambience. For a more architectonic quality, typical of bungalows or colonial revival houses, combine a backband (a thick notched moulding) with a flat or profiled casing together with a flat baseboard and cap moulding.
Remember, it’s not just cutting and installing the moulding that takes time, but the sanding, puttying, priming, and painting required to finish it: a big job, but one well worth it.